Starting from v3.1.0+, System Proxy is enabled by default for new users and Existing users retain their current preference settings.
1. Accessing Proxy Settings
- Open Bruno.
- Click on the Preferences section from the bottom left corner.
- Navigate to the Proxy tab in the sidebar.
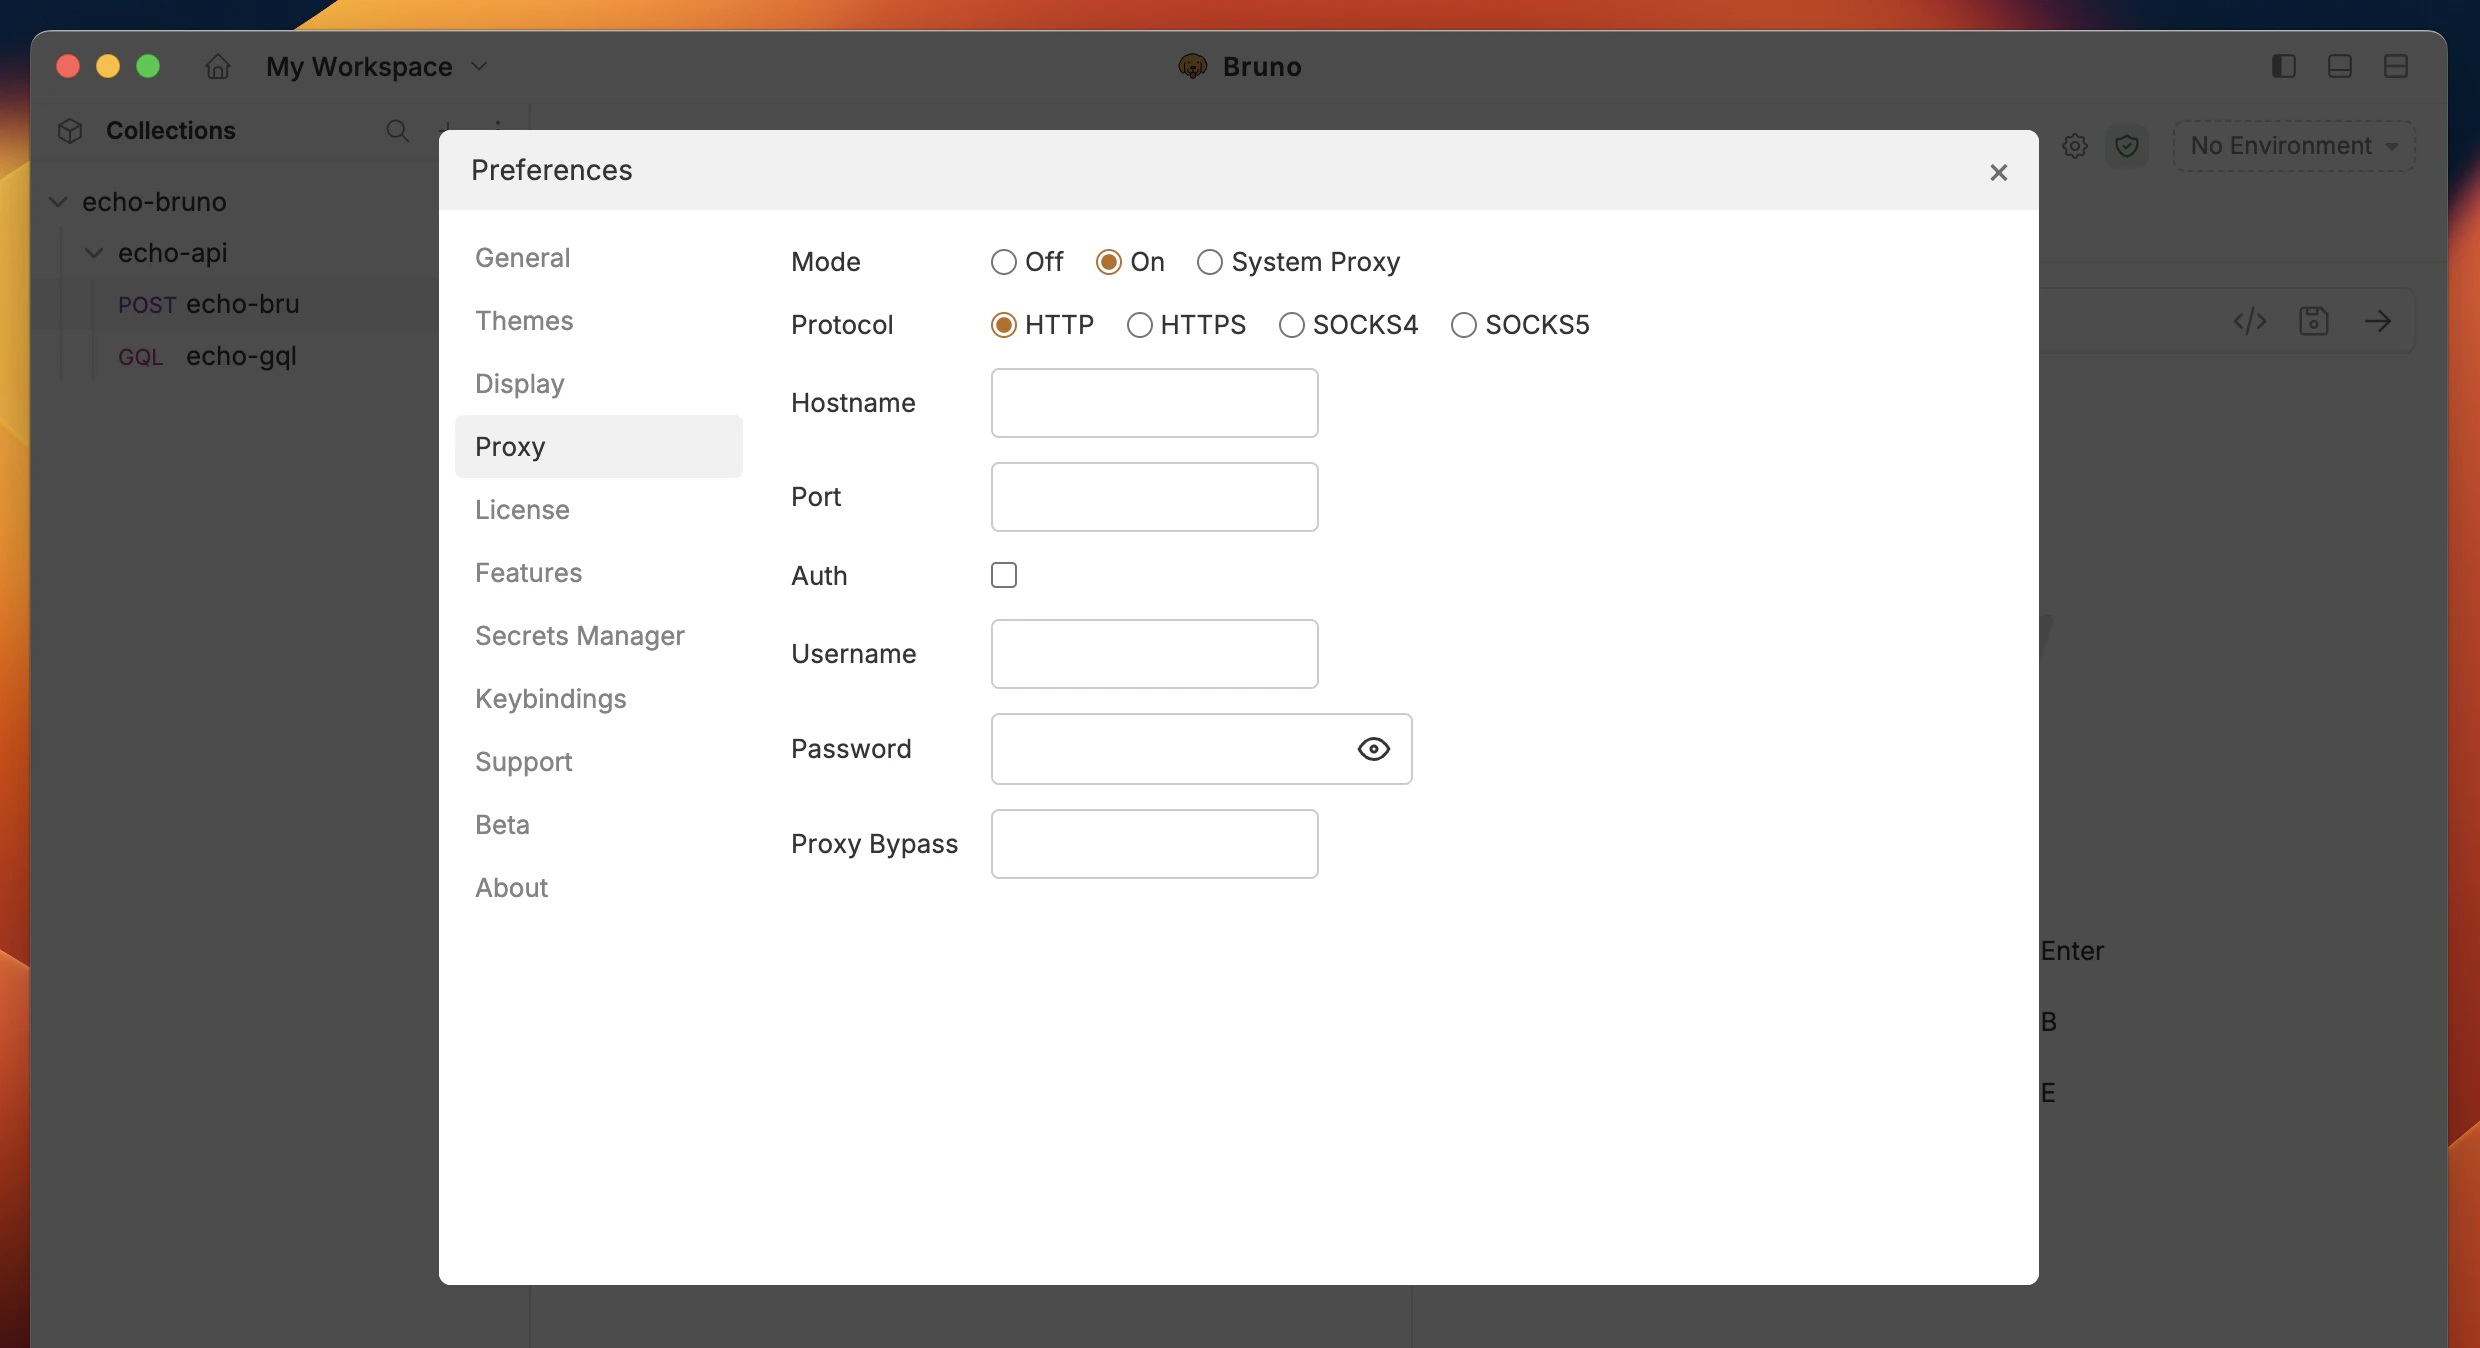
2. Configuring Proxy Mode
Bruno provides three options for proxy mode:- Off: Disables proxy usage.
- On: Enables proxy and routes requests through the configured proxy.
- System Proxy: Uses the system-wide proxy settings.
3. Selecting Proxy Protocol
Bruno supports different proxy protocols. Choose one of the following:- HTTP
- HTTPS
- SOCKS4
- SOCKS5
4. Entering Proxy Details
Fill in the required fields:- Hostname: The proxy server’s domain or IP address (e.g.,
example.com). - Port: The port number for the proxy connection (e.g.,
3000).
5. Enabling Authentication (Optional)
If your proxy requires authentication:- Check the Auth checkbox.
- Enter the Username.
- Enter the Password (Click the eye icon to reveal the password if needed).
6. Configuring Proxy at Collection Level
There may be instances in which your collection needs to use a different proxy than what you have configured globally. Configuring proxy settings at the collection level will override any configuration you’ve made in the preferences section. Below are instructions on proxy settings at the collection level:- Open the collection settings.
- Navigate to the Proxy tab.
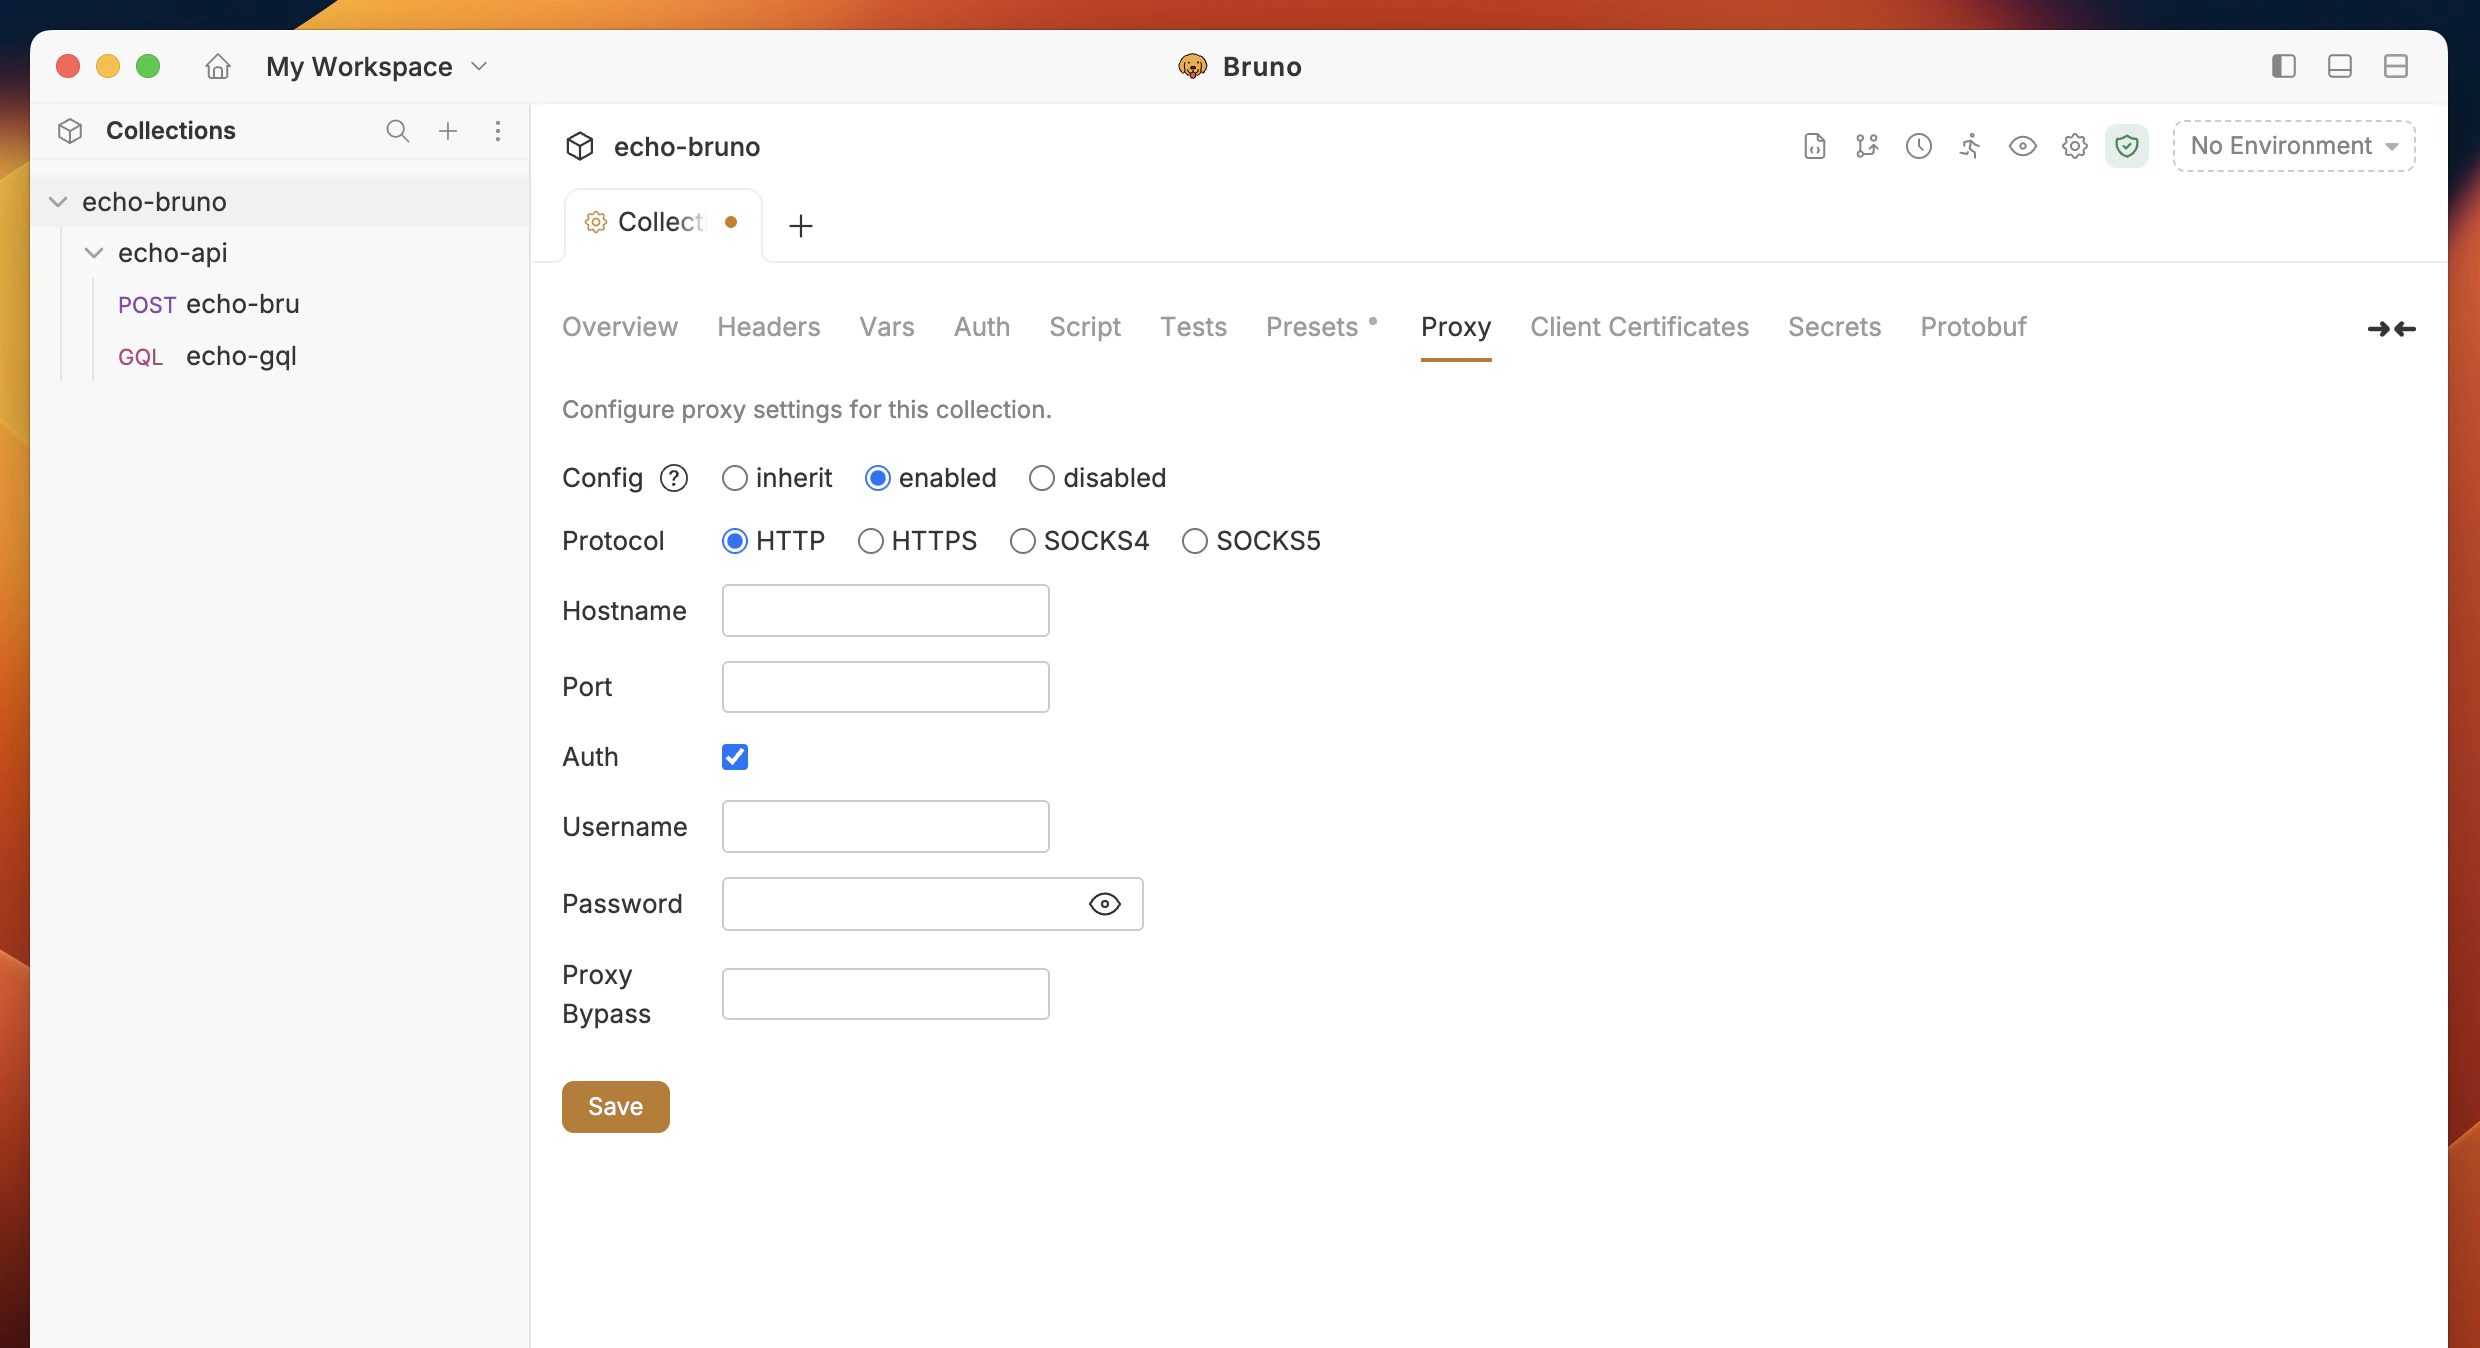
Choose the Configuration Mode:
- inherit: Uses the main proxy settings from Preferences.
- Enabled: Enables a custom proxy for this collection.
- Disabled: Disables the proxy for this collection.
- Choose inherit, enabled, or disabled.
- Enter the Hostname, Port, Protocol, Username, and Password if needed.
- Click Save to apply the settings.
7. Proxy support for gRPC requests
Bruno’s proxy settings apply to both HTTP and gRPC requests. However, gRPC proxy support has the following limitations:- Only HTTP proxies are supported — gRPC connections use HTTP CONNECT tunneling. SOCKS4, SOCKS5, and HTTPS proxy protocols are not supported for gRPC. If you configure one of these protocols, gRPC requests will bypass the proxy and connect directly.
- Authentication is supported — proxy username and password work the same as for HTTP requests.
- Bypass rules apply — the bypass proxy list is respected for gRPC requests.
- System proxy mode — when set to “System Proxy”, gRPC uses the standard
http_proxy/https_proxyenvironment variables. Only HTTP-protocol system proxies are used; non-HTTP system proxies are ignored.
If your proxy is configured with a SOCKS or HTTPS protocol, gRPC requests will connect directly without going through the proxy. HTTP/REST requests are unaffected and will continue to use the configured proxy protocol.